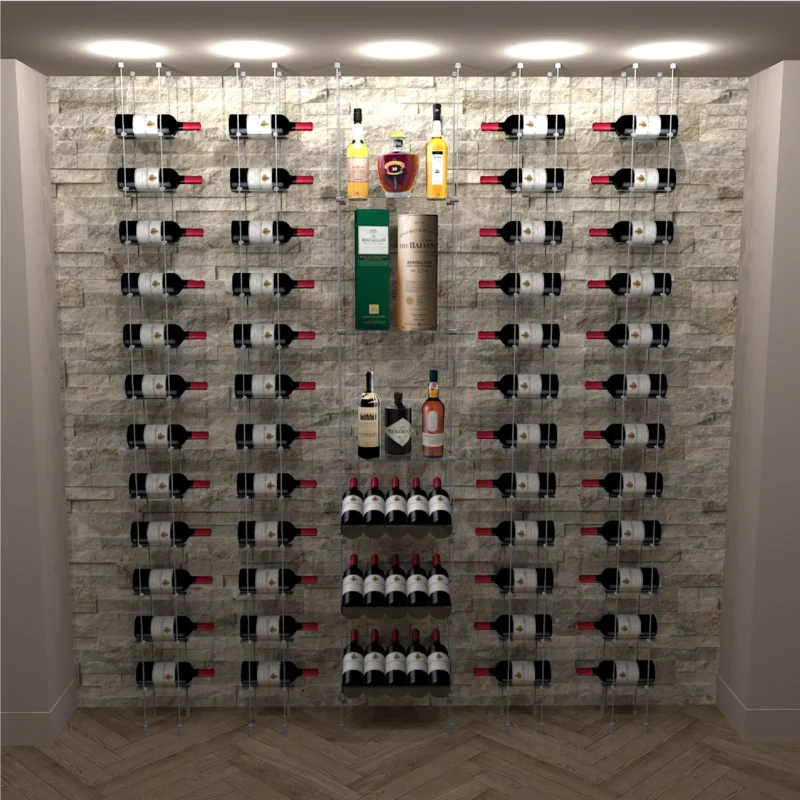
A great wine cellar looks effortless. The bottles seem to float, the light falls exactly where it should, and the room holds a steady 55°F no matter what the weather is doing outside. But that effortless result is the product of a deliberate, carefully sequenced wine cellar design process, one where every decision builds on the one before it.
Whether you’re converting an unused closet, finishing a basement, or planning a glass-enclosed showpiece in a new build, understanding how the process works will help you make better decisions, avoid expensive rework, and end up with a cellar that performs as well as it looks. Here’s how a custom wine cellar comes together, step by step.
Step 1: The Design Consultation — Defining Your Vision
Every successful project starts with a conversation. Before anyone talks about cooling units or cable tension, a designer needs to understand how you’ll actually use the space. The most useful questions at this stage include:
- How many bottles do you own today, and how many do you expect to own in five years? Most collectors underestimate growth. Planning for 25–50% more capacity than you need now is a common rule of thumb.
- Is this a storage room, a display, or both? A long-term aging cellar and an entertaining showpiece have different priorities.
- What does your collection look like? Standard Bordeaux bottles, Champagne, magnums and large formats all need different racking.
- What style fits the home? Modern and minimalist, warm and traditional, or a blend of cable, wood and metal.
- What is the budget and timeline? Being upfront here lets your designer prioritize where the investment matters most.
At Cable Wine Cellars, this first step is a free design consultation. It’s the best time to share inspiration photos, floor plans and any constraints you already know about.
Step 2: Site Assessment — Understanding the Space
Once the vision is clear, the next step is an honest look at the room itself. The location you choose shapes nearly every technical decision that follows. A thorough site assessment covers:
- Dimensions and ceiling height: these determine bottle capacity and racking layout.
- Adjacent spaces: walls shared with a garage, an exterior wall, or a sunny living room add heat load.
- Wall and floor construction: framing, concrete slab, or existing finishes affect insulation strategy and how racking is anchored.
- Access for equipment: where a cooling unit can exhaust heat, and where condensate can drain.
- Electrical and lighting: available circuits and where fixtures can go.
In warm, humid climates like South Florida, this step deserves extra attention. Humidity and heat gain are the two forces your cellar will be fighting every day of the year.
Step 3: Building the Thermal Envelope
This is the step most people skip in their imagination and the one that matters most in reality. A wine cellar is a cold room, and it has to be built like one. The goal is a stable environment of roughly 55°F to 58°F and 60–70% relative humidity, held consistently year-round.
That starts with the envelope: insulation, vapor control and air sealing on every surface that separates the cellar from warmer space, including walls, ceiling, floor and every penetration. We strongly recommend closed-cell spray foam for this. It insulates, air-seals and acts as a vapor retarder in a single continuous layer. Our deep dive, The Cold Truth About Wine Cellar Insulation, explains why.
The door matters too. An exterior-grade, weather-stripped door with a threshold seal, or properly specified insulated glass, keeps conditioned air where it belongs.
Step 4: Sizing and Selecting the Cooling System
Only once the envelope is defined can the cooling system be sized correctly. A heat load calculation accounts for the room’s volume, insulation values, glass area, adjacent conditions, lighting and expected door openings. That number determines the BTU capacity you actually need.
From there, you’ll choose a system type:
- Self-contained (through-wall): the most straightforward option when an adjacent room can absorb the exhaust heat.
- Ducted: the unit lives outside the cellar and moves conditioned air through ductwork. Quiet and discreet.
- Split system: a condenser located remotely, often outdoors, with a small evaporator in the cellar. It’s the quietest option and ideal for larger or glass-heavy rooms.
An oversized unit short-cycles and struggles to manage humidity. An undersized one runs constantly and wears out early. Getting this right is one of the most valuable parts of the wine cellar design process. For a closer look at the full build, read How to Build a Temperature-Controlled Wine Cellar.
Step 5: Racking Design and Layout
Now comes the part everyone looks forward to. Racking design balances three goals: capacity, display and access. Your designer will map each wall, accounting for bottle sizes, sightlines from outside the room, and how you’ll reach your most-used bottles.
Common racking choices include:
- Cable wine racks: tensioned floor-to-ceiling cables that hold bottles label-forward and appear to float. They work beautifully on feature walls and behind glass. Learn more in How Cable Wine Racks Work.
- Peg and invisible systems: minimal wall-mounted pegs for a clean, gallery-style display.
- Wood racking: traditional bins and diamond cubes for high-density bulk storage.
- Mixed-material designs: combining cable, wood and metal to get display and density in the same room.
Because cable systems present every label face-out, how you organize the collection becomes part of the design. See Organizing Your Wine Collection for a Labels-Forward Display for ideas.
Step 6: Lighting, Finishes and Glass
Lighting turns a storage room into a showpiece, but it has to be chosen carefully. Use LED fixtures only. They produce minimal heat and no meaningful UV, both of which can damage wine over time. Linear LED strips behind or along cable runs, recessed accents, and dimmable controls let you highlight the collection without adding heat load.
Finishes should tolerate a cool, humid environment. That means moisture-resistant materials, sealed wood, and flooring such as stone, tile or properly prepared hardwood. If your design includes glass walls or doors, condensation control becomes part of the plan. Insulated glass, proper cooling placement and air movement all play a role, as covered in Glass + Cable: How to Avoid Condensation.
Step 7: Construction and Installation
With the design approved, construction follows a deliberate sequence. Getting the order right prevents costly mistakes:
- Framing and rough-in for electrical, cooling line sets and condensate drains
- Blocking or reinforcement where cable racking and wall systems will anchor
- Insulation and vapor control on every surface
- Drywall or wall finishes, flooring and ceiling
- Cooling system installation
- Door and glass installation
- Racking installation, cable tensioning and lighting
Planning structural blocking early is especially important for cable racking. Tensioned cables need solid anchor points at the floor and ceiling, and adding them after drywall is far more disruptive. If you’re a builder or contractor, our guide Contractor Know-How covers these details in depth.
Step 8: Commissioning and Your First Bottle
Before the collection moves in, the cellar should run empty long enough to stabilize. That lets you confirm the cooling system holds temperature and humidity in its target range and cycles normally. Check for condensation on glass and equipment, verify the drain lines, and make sure the door seals completely.
Then comes the best part: loading the racks. Move bottles in gradually, organize them by how you’ll use them, and enjoy a space that was designed around your collection from day one. To keep it performing, follow the fundamentals in The Complete Guide to Proper Wine Storage.
Common Wine Cellar Design Mistakes to Avoid
- Buying the cooling unit first. Equipment should be sized after the envelope is designed, not before.
- Skipping the vapor barrier. Moisture inside walls leads to mold, rot and failed insulation.
- Planning for today’s collection only. Running out of space a year later is the most common regret.
- Using heat-producing lighting. Halogen and incandescent fixtures fight your cooling system.
- Forgetting drainage. Every cooling system produces condensate, so plan where it goes. See 3 Smart Ways to Prevent Water Damage in a Wine Cellar.
Wine Cellar Design FAQ
How long does the wine cellar design process take?
It depends on scope. A small closet conversion or a single cable wine wall can move from design to installation quickly. A full custom room in a new build follows the general construction schedule. The design phase itself usually moves fastest when you come prepared with measurements, photos and a clear sense of capacity and style.
How much space do I need for a wine cellar?
Less than most people think. A climate-controlled cellar can fit in a converted closet or under a staircase, and a cable wine wall can turn a narrow hallway or dining room wall into a display. Capacity depends more on wall area and ceiling height than on floor space.
What temperature and humidity should a wine cellar be?
The widely accepted target is about 55°F to 58°F with 60–70% relative humidity. Consistency matters as much as the numbers themselves, because frequent swings are what damage wine.
Can cable wine racks be used in a climate-controlled cellar?
Yes. Cable racking is well suited to temperature-controlled cellars and glass-enclosed wine rooms, provided the anchor points are planned during construction and the envelope is built correctly. Explore the options in The Complete Guide to Float Cable Wine Racks.
Start Your Wine Cellar Design
The best cellars are designed as a single system, where insulation, cooling, racking and lighting work together instead of being chosen one at a time. If you’re ready to begin, our team will walk you through every step of the wine cellar design process, from the first sketch to the first bottle. See what’s possible on our Luxury Custom Wine Cellars page, then reach out for a complimentary consultation.