A great wine collection deserves more than a dark corner. Temperature fluctuations, humidity swings, and UV light are the three biggest threats to wine over time — and a properly built, climate-controlled cellar eliminates all of them. Whether you’re converting a basement room or building from scratch, here’s how to do it right.
Step 1: Choose Your Space
The best cellar starts with the right room. Basements are the most popular choice because they’re naturally cooler and insulated from temperature swings, but any room can work if it’s properly built out.
What to look for:
- Size: Decide how many bottles you want to store now and in five years. It’s far easier to build bigger upfront than to expand later.
- Location: Avoid spaces with exterior walls on multiple sides, direct sunlight, or proximity to heat sources like furnaces or water heaters.
- Ceiling height: Standard 8-foot ceilings work fine. Higher ceilings give you more racking options and a more dramatic look.
- Existing conditions: A room that’s already cool and somewhat insulated will be cheaper to condition than one that starts warm.
Step 2: Insulate Properly
Insulation is the foundation of a functional cellar. Without it, your cooling unit works overtime and still struggles to maintain stable conditions — leading to higher energy bills and inconsistent temperatures.
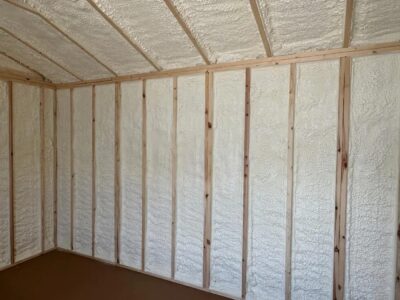
Every wall, the ceiling, and the floor (if above grade) should be insulated. Spray foam insulation is the gold standard for wine cellars because it creates an air seal in addition to thermal resistance. Rigid foam board is a solid alternative. Aim for a minimum R-13 in the walls and R-19 or higher in the ceiling.
Pay close attention to penetrations — any gap around pipes, wires, or ducts is a path for warm, humid air to enter. Seal everything.
Step 3: Install a Vapor Barrier
Moisture control is just as important as temperature control. Without a vapor barrier, humid outside air can migrate through your walls, condense inside the insulation, and cause mold. The vapor barrier goes on the warm side of the insulation — typically the exterior side of the wall — and should be continuous with no gaps or tears.
This step is easy to overlook and expensive to fix after the fact. Don’t skip it.
Step 4: Choose and Size Your Cooling Unit
The cooling unit is the heart of the cellar. There are three main types:
Self-contained (through-wall) units are the simplest to install. They mount through the wall with one side inside the cellar and one side exhausting heat into an adjacent room. Best for smaller cellars where there’s a conditioned space on the other side of the wall.
Ducted split systems separate the evaporator (inside the cellar) from the condenser (outside, in a mechanical room or exterior location). They’re quieter, more powerful, and better for larger or custom cellars.
Ducted self-contained units offer a middle ground — more flexible placement than a through-wall unit without the complexity of a full split system.
Sizing matters. Too small and the unit runs constantly without hitting target temperature. Too large and it short-cycles, which reduces humidity control. To size correctly, factor in your room’s cubic footage, insulation values, heat load from lighting, and ambient temperatures in the space outside the cellar. When in doubt, consult with a cellar specialist — oversizing is a common and costly mistake.
Step 5: Build Your Door
The cellar door is one of the most overlooked parts of the build, and one of the most important. A standard interior door leaks conditioned air constantly. You need a door that’s:
- Insulated (solid core at minimum, purpose-built wine cellar doors are better)
- Sealed with a full perimeter gasket to prevent air infiltration
- Equipped with a threshold seal at the bottom
Glass doors are popular for the visual effect but require double or triple-pane glass to maintain thermal performance. If you’re using a glass door, factor that into your cooling unit sizing.
Step 6: Plan Your Lighting
Light — particularly UV light — degrades wine over time. Incandescent bulbs generate heat; both are problems in a cellar.
LED lighting is the right choice. LEDs produce minimal heat, no UV, and are available in warm color temperatures that complement wood racking and bottle labels. Keep lights on timers or motion sensors so they’re not running unnecessarily, and avoid positioning fixtures directly above bottles.
Step 7: Choose Your Racking
Once the room is built and conditioned, the racking brings it to life. This is where Cable Wine Cellars comes in.
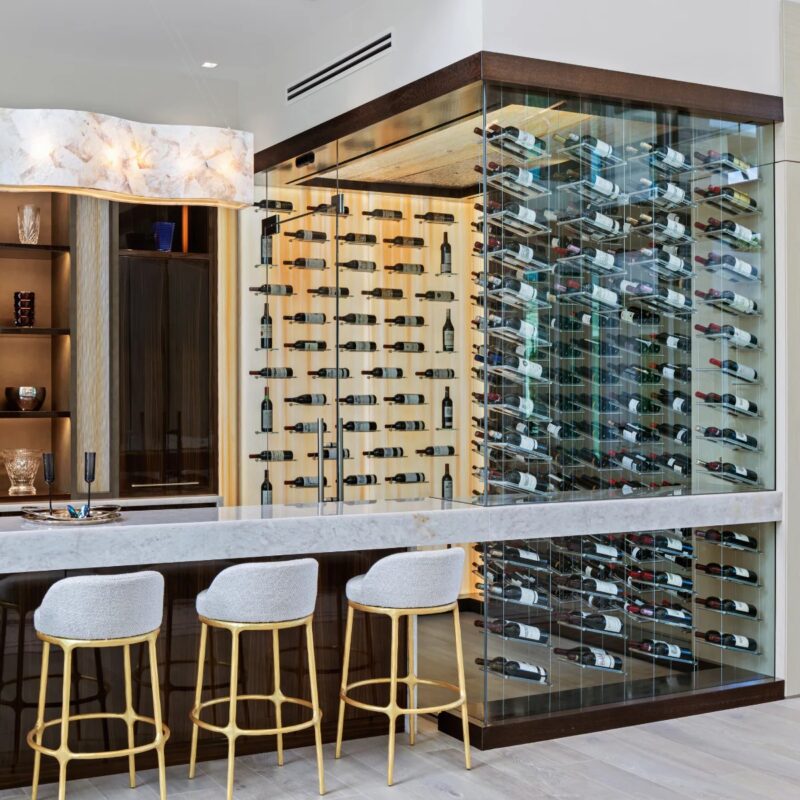
Cable wine racks are an excellent choice for climate-controlled cellars because they maximize airflow around bottles, don’t trap heat the way solid wood can, and create a stunning visual display that showcases your collection. The tension cable system works with virtually any wall finish, so you can combine exposed brick, stone, or custom millwork with the rack without compromising either.
Think through your layout before installation: how many bottles, what column and row spacing, and whether you want to integrate shelving for glassware or presentation pieces. A well-planned rack makes the most of every square foot.
Step 8: Set and Monitor Your Conditions
Target conditions for wine storage are 55°F (13°C) for temperature and 60–70% relative humidity. Once your cooling unit is running, give it 24–48 hours to stabilize before loading your collection.
Invest in a digital thermometer/hygrometer and check it regularly, especially in the first few weeks. If temperature swings more than a few degrees or humidity drifts outside the target range, troubleshoot before filling the cellar — it’s much easier to fix issues when the racks are empty.
Many modern cooling units have built-in digital controls and some offer remote monitoring via app, which is worth considering if you travel or want peace of mind from a distance.
Step 9: Load Your Collection
With conditions stable and racking in place, you’re ready to store wine. A few tips:
- Organize by type or region so you can find bottles without disturbing neighbors
- Store bottles horizontally to keep corks moist (cable cradles handle this automatically)
- Leave some space — a cellar that’s 80% full circulates air better than one that’s packed to capacity
- Catalog your collection with a wine app or simple spreadsheet so you always know what you have and when to drink it
Let Cable Wine Cellars Help
Cable Wine Cellars offers a range of ducted split systems that combine efficiency, discretion, and design flexibility. Whether you’re building a wine room in a private residence, restaurant, or luxury hotel, our team can help you select and install the right system for your needs.
Need expert advice? Contact us today for a free consultation and custom recommendations.